 The following is a simple and very inexpensive - yet stylish - way to modify your Ninja 250's enormous, black rear fender. The result is a "cleaner" and more streamlined look to your sportbike! To the best of my knowledge, this modification only applies to the EX250-F. If this procedure also applies to any of the other models of the Ninja 250, please let me know! As you do this fender elimination, you will have to make a series of important decisions. I'll begin by quickly outlining those issues...
License Plate: You have two primary options with the license plate. These instructions involve the construction of a new license plate bracket from aluminum angle stock. If you don't have the desire to go that far, you can plan ahead by cutting your fender in such a way that you leave "tabs" for the licnese plate to bolt onto.
Lincense Plate Light: Once again, two primary options. Here, you can either decide to keep your stock license plate light or just remove it. I did away with my license plate light. Simply put, it isn't needed. The bike's tail light and the headlights of the car behind you do a fine job of lighting it up. In addition, you will notice that the bottom of your tail light lens has a rectangular section of non-transparent plastic. Removing this piece with a screwdriver will shine even more light on your license plate, given that your tail light is always on when your bike is running. To seal this opening up, many people have attached a clear piece of plastic to the inside of the tail light lens. A CD jewel case works well for this purpose. Your tail light lens is very simple to remove. There are only a few screws holding it in place. Remove the lens and it should be obvious what you need to do. If you still have questions, just ask.
Rear Turn Signals: Here, you have several options. Your first option is to cut your fender in such a way that you leave the turn signals attached exactly where they are. A second option is to remove your stock turn signals and attach them further up on the fender (or even on the tail section itself), allowing you to chop off more of the stock fender. A third option is to simply relocate your rear turn signals into the vacant pods on each side of your tail light assembly. This add just a little more work to your task, but is something several people have done to clean up the look of the bike. Integrating your rear turn signals into the vacant pods will not be covered in this article, but is also rather simple to perform. Removing the lenses from the vacant pods should answer most of the questions you may already have. If you want to get even fancier, you can install dual filament bulbs in those pods such that you can run the lights as turn signals, brake lights and/or extra tail lights! As a precaution, I would advise against using dual-filament bulbs to run those lights as running lights and turn signals unless you also add relays to your design. Why? From personal experience, the difference between the low and high filaments is not very noticeable in traffic situations! I had several complaints from friends who said it was difficult to identify the turn signals with the low filaments being used for running lights. With the addition of a few relays, you can use the lights as running lights, but disable it as a running light when your turn signal comes on.
If you have any questions about any of the items mentioned here, contact me or visit the Ninja 250 Riders Club Forum.
1. Okay, the first thing you need to do is remove your rear fender! Remove the four bolts that hold the fender to your bike. A rachet and 10mm socket or a 10mm wrench will do the trick. Whether you decided to keep the license plate light or not, clip the wires in a convenient spot (not too close to the light and not too far into the bike). If you choose to keep the light, you can crimp connectors onto the wires later so that you can add or remove the light at any time.
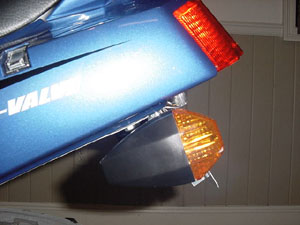
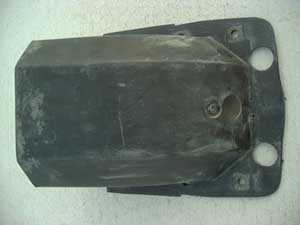
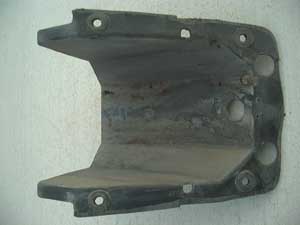
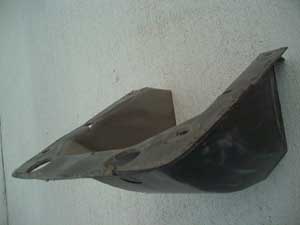
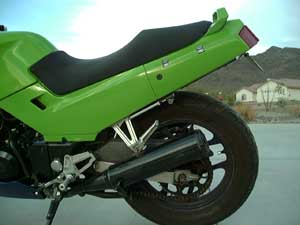
2. Proceed by removing all of the license plate and light hardware and chopping the fender as shown in the following three pictures. If you decide to keep tabs for mounting the license plate and/or turn signals, make sure and highlight those areas before cutting! Electric reciprocating saws work quite well for cutting the fender. Otherwise, a standard hacksaw will probably do the job. Be sure and clamp the fender securely to a work table before starting to saw and observe all typical shop safety guidlines! Don't worry about being too perfect with this cut. The cut line is up against the underside of your bike, so it won't be very noticeable. After you finish the cut, take a file and smooth the edges over as shown in the pictures. If you're concerned about having a perfect edge on the fender or you want to keep the original fender unaltered just in case you change your mind, here's a link to a company that provides aftermarket Ninja 250 fenders of the same general shape as the cut fender I'm describing here: LINK. It's important to note that I have no experience with this aftermarket fender or the company itself.
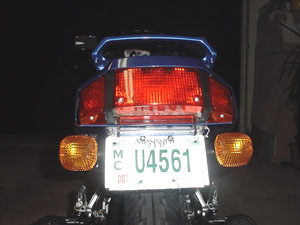
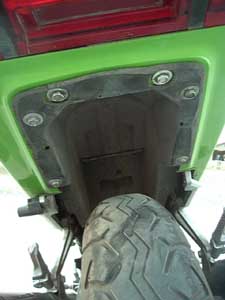
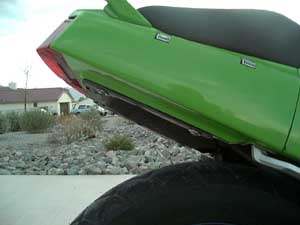
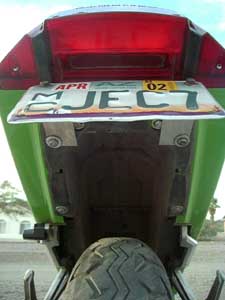
When completed with the fender, it should now look like this on the bike (without the license plate, of course)...

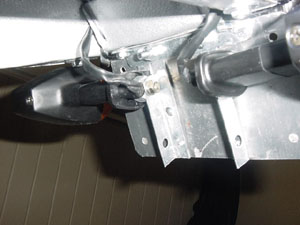
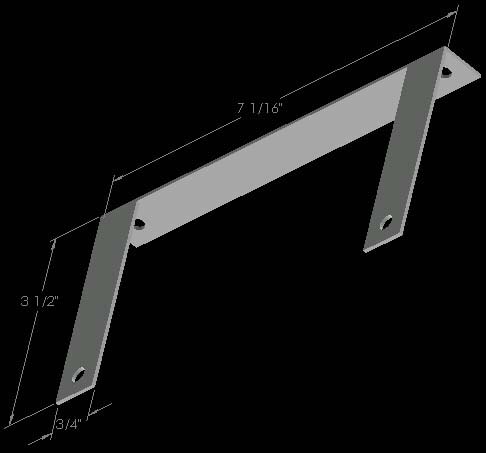
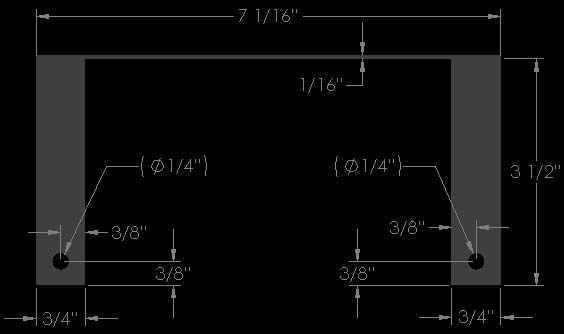
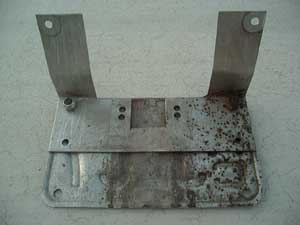
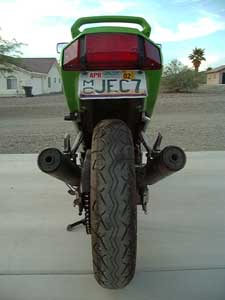
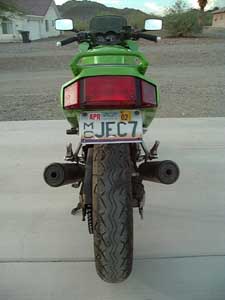
As I mentioned above, the license plate can be mounted by making a custom bracket. Mine was made out of a scrap piece of 1/16" thick aluminum angle that was laying around the shop. You can make yours out of a flat piece and simply create the necessary bends with a hammer or vice. Dimensions for the bracket are as follows. If you decided to keep your license plate light, you can make the appropriate tabs longer to allow room to mount the light above the license plate. Note that if you don't have a 4"x7" license plate, the hole pattern for your license plate may be different than what is shown here in the third picture...

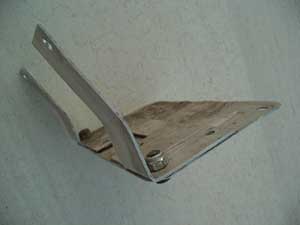
Once fabricated, it should look like this. Note that the bracket in these pictures is bent. You will do this later in the process. For now, simply bolt the new bracket to your license plate with any available hardware.

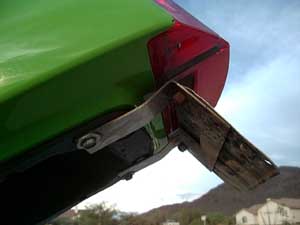
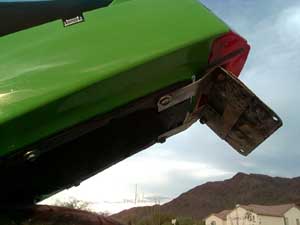
Bolt the license plate and bracket to your bike by inserting the bracket underneath the two rear bolts that hold the fender on. Once the bolts have been tightened, you can now bend the bracket with both hands until you obtain your desired license plate angle. If you cannot bend the bracket enough while it is mounted to the bike, simply remove the bracket and bend it against the ground or in a vice, then re-install. The finished product should look something like this!...
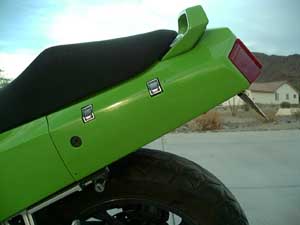
There are dozens of different ways to modify or eliminate your rear fender. To give you an idea of what the different methods look like before performing your fender exhorcism, I will periodically add pictures of other Ninja 250 fender modifications here...
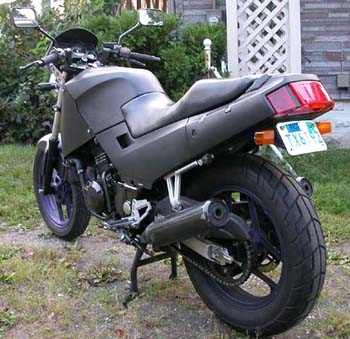
Alan Thompson's fender elimination and custom, metal fender